What’s this? I’m keeping my word? Two tips in one week?! Well, don’t let it fool you. I cheated. I wrote these 2 days ago 🙂 So let us continue on and wrap up this little lesson on linked model visibility.
First I want to thank my Buddy Gerry Hogsed for letting me use his house design. It is a project that he copmleted in school studio, and received VERY marks with!
So last time we talked about the easy ones, By Host and Custom. If you need a recap, click the Previous post link. So lets say you have a project where you have two sections of a building in one view. The second floor level in your main model is at 10′ AFF and the second floor in your linked model is at 15’AFF. How do you get them to look right in a single view? This is where By Linked View comes in. Essentially we set the view up IN THE LINKED MODEL before loading it in. Let’s take a look at how this is done.
Part1
Part 2
So obviously, the first step is to set up your views in the linked model. This includes VG, View Range, Plan regions, etc, etc. Whatever you do in the view you are linking, is what is going to show up in the main model once you link it in.
Be sure you name your view accordingly, IE: Linked View – Second Floor. You’ll see why in a minute. Don’t rename the current views you are using. Instead duplicate them (with detail if needed) and name them accordingly.
Once the link is loaded into your model, summon the View Graphics dialogue (‘VG’), and head to the Revit Links tab.
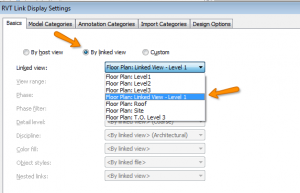
Change the Display Settings to By Linked View.
We now have an option to select from a drop down box. If you drop that down, you’ll see that there are some views here to choose from that are in the Linked model. See now why we named our view accordingly? Can you imagine trying to guess which one it was in a large model? Select the correct view, and click OK a couple of times.
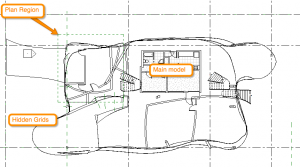
We can now see that our linked model now behaves just like the view we set up in the link.
Why do this over Custom? Well, Custom only allows you to set things such as category visibility and overrides. By Linked View, as you can see, allows us to control View Ranges, Plan Regions, etc. Everything that we can control in the view of the linked model, can be transferred to this view using By Linked View.
Yes, I can hear the gears turning now. You see why I saved this gem for last? I hope you have taken something from today’s Revit TotD, and hope that it brings you back for yet another. Have a great day!
-Carl Gibson


