Keeping in the spirit of answering frequently asked questions in the RevitCity.com chat, I figured I’d field this one since it has only been asked… about a dozen times this week! It’s apparent that the direction of design is just begging people to know how to make those funny leaning walls! So here we are, learnin’ sumtin new!
So I’ve actually had quite a few versions of this video across the years as people have asked this, but tonight, you get to see and hear it in it’s most recent grandeur. Creating a wall that is out of plumb is actually more of a massing issue than it is a wall issue and involves a few different steps. This is how I would recommend you create such a wall in a project beyond conceptual phase. The same method applies to conceptual masses that are brought in to projects from a conceptual mass done in the Conceptual Design Environment. This also requires you have some understanding of massing, which is not covered in this TotD. 🙁
(NOTE: I messed up the pictures for this one, I apologize, I’ll get these up as soon as I can in the morning, but I gotta get some sleep X_X)
Part One:
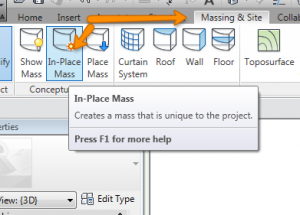
- Begin an In-Place Mass. If you are using the standard Revit template, you will be asked to enable masses in the project.


- Name it whatever you want that is descriptive of its purpose: “OutofPlumbWall1” works fine.
- Create a mass with one face that is at the angle of the wall you want to create. You are not massing the actual wall (while that is possible, it’s not ideal, you’ll see why later), just a mass with a face that is at that angle. I usually make my mass in a 3D view and choose a wall face to use as my workplane.

- Adjust and Finish the mass.

With Part one complete, you should have a nice ugly out of plumb looking mass in your project. If it’s ugly at this point, congrats, you’re on track! on to part two!
Part Two:
- Select the Wall tool in the Model from Face panel of the massing & site ribbon.

- Pick the angled face of the mass.
- Tada! Insta out of plumb wall!
Now you can also use the Curtain System tool here as well to create a Curtain Wall-like system on that face. You’ll notice that you can not use the Curtain Wal types that are defined in the project with the Wall tool that we just used in this process. You will have to define these Curtain Sytems in a different manner (perhaps a different TotD? We’ll see!)
Thanks again for stopping by for a Revit TotD! I hope you learned something new and look forward to having you again for the next Revit TotD!
-Carl


4 responses to “Revit TotD – 10.15.2010 | How you make them funny leaning walls?”
A Clear tutorial Carl.
Great job. Many users can benefit from it.
-Silleke-
Can you please illustrate another example with the leaning wall also at an angle with the reference plane you started with in your recent video? The problem here is the corner wall joints. Do you suggest to use voids to clean up the excessive areas of the inclined wall?
-Silleke-
Silleke,
In regards to voids, not at all. You will need to update the mass to fit between your other walls. Once the mass face is between the two end walls you can use the “update wall” command to update the geometry of the wall to the new mass face. Once you have the wall in between the end walls they will join nicely so long as the materials are consistent. This is demonstrated towards the end of the video.
Carl,
I followed all the steps successfully, and I am very thankful for your tutorial. On the other hand I am having a hard time to make the leaning curtain wall be shown on elevation (just a part of it is shown). How do i do that?
Thanks much!