You probably wouldn’t believe me when I told you how many requests I get about how to add doors into curtain walls. Or maybe you’re one of the many that have struggled with this and would in fact believe me with how many requests I get! Whichever boat you float in, I’m glad you stopped by; because today, I’m going to show you a few tips on the basic building blocks behind curtain wall panels.
As mentioned in the previous TotD, curtain walls have many components, one being the panel. The panel is the infill between all the grids in a curtain wall. The Panels that Revit provides us out of the box are system panels (ie: system families), and can not be edited in the family editor. You can however, create new curtain panels in the family editor to be used in your projects.
Creating a new curtain wall family:
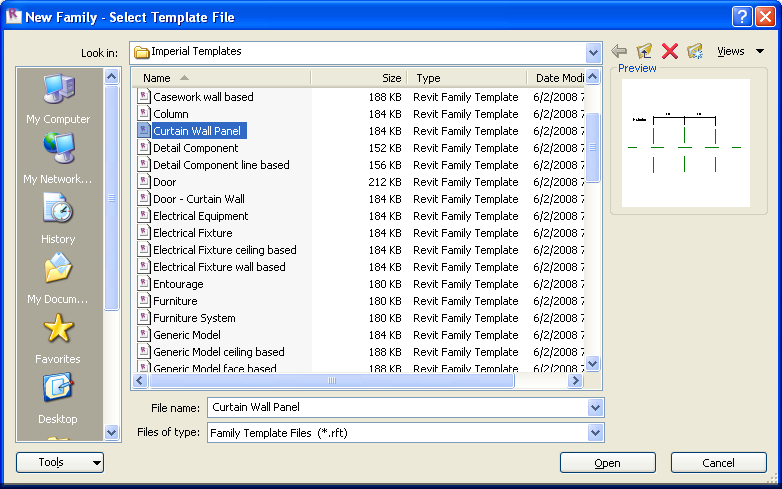
- File > New > Family (or New Family from the recent files page)
- Choose the Curtain Panel.rfa template file (this is one of the two family templates that can be used to create curtain panels)

- Notice the reference planes already in place. Your masses must constrain to these reference planes if you want the panel to work within the grids on your curtain wall.

- You can also use material and other parameters to customize your panel

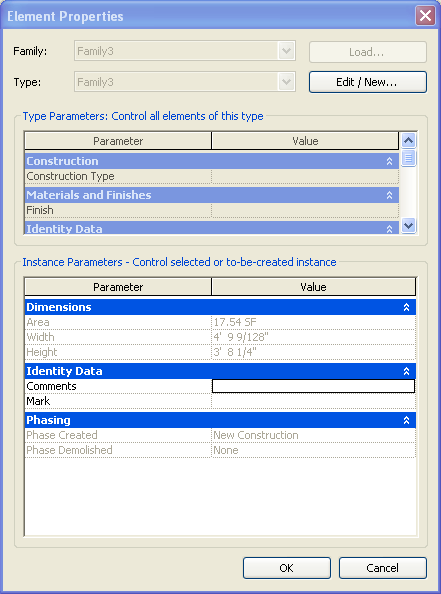
A few properties oft he curtain panel to understand:
- Instance Parameters
- Type Parameters
So that does it for today. This will hopefully give you a nice foundation for the curtain wall doors we will be discussing tomorrow. Thanks for stopping by, and I hope everyone makes it for tomorrow’s Revit TotD!
-Carl


One response to “Revit TotD – 6.9.09: Curtain Walls.3 | The Curtain Panel”
Hello,
First off thanks for posting this info!
I believe your link is pointing to the wrong Video.
Keep ’em coming!